In the previous part of this tutorial, we created the basic architecture for custom fields feature. We have developed models and decorator classes. Let’s move on and use them in the controllers and views part of our Rails Application.
In this article, we move on from the first part of the tutorial and create controllers and views for our shop with products that has custom fields, and at the end of the article, we will test our Rails Application.
Specifying Nested Routes for the Shop Model
Open your config/routes.rb file to modify the relationship between your resourceful routes.
Currently, the file looks like this:
Rails.application.routes.draw do
  resources :shops
  resources :custom_fields
  resources :products
end
The current code establishes an independent relationship between our routes when what we would like to express is a dependent relationship between shops and their associated products and custom fields.
Rails.application.routes.draw do
  resources :shops do
    resources :custom_fields
    resources :products
  end
end
Save and close the file when you are finished editing.
With these changes in place, you can move on to updating your products controller.
Updating the Products Controller
The association between our models gives us methods that we can use to create new product instances associated with particular shops. To use these methods, we will need to add them to our products controller.
Open the products controller file:
nano app/controllers/products_controller.rbChange code of products controller to this:
class ProductsController < ApplicationController
  before_action :set_shop
  before_action :set_product, only: [:show, :edit, :update, :destroy]
  before_action :decorate_product, only: [:show, :edit, :update]

  def index
    @products = @shop.products
  end

  def show; end

  def new
    @product = CustomFieldDecorator.new(@shop.products.build)
  end

  def edit; end

  def create
    product = CustomFieldDecorator.new(@shop.products.new)
    product.assign_attributes(product_params)

    respond_to do |format|
      if product.save
        format.html { redirect_to shop_products_path(@shop), notice: 'Product was successfully created.' }
        format.json { render :show, status: :created, location: product }
      else
        format.html { render :new }
        format.json { render json: product.errors, status: :unprocessable_entity }
      end
    end
  end

  def update
    respond_to do |format|
      if @product.update(product_params)
        format.html { redirect_to shop_products_path(@shop), notice: 'Product was successfully updated.' }
        format.json { render :show, status: :ok, location: @product }
      else
        format.html { render :edit }
        format.json { render json: @product.errors, status: :unprocessable_entity }
      end
    end
  end

  def destroy
    @product.destroy
    respond_to do |format|
      format.html { redirect_to shop_products_url(@shop), notice: 'Product was successfully destroyed.' }
      format.json { head :no_content }
    end
  end

  private

  def set_shop
    @shop = Shop.find(params[:shop_id])
  end

  def set_product
    @product = @shop.products.find(params[:id])
  end

  def decorate_product
    @product = CustomFieldDecorator.new(@product)
  end

  def product_params
    params.require(:product).permit(:name, :description, :price, *custom_fields)
  end

  def custom_fields
    @shop.custom_fields.pluck(:internal_name)
  end
end
Let’s look closer to new methods that we added to the controller.
  def decorate_product
    @product = CustomFieldDecorator.new(@product)
  end
Method decorate_product decorates a product object that’s associated with the specific shop instance and gives us the capability to use custom fields as standard properties of product object.
  def product_params
    params.require(:product).permit(:name, :description, :price, *custom_fields)
  end

  def custom_fields
    @shop.custom_fields.pluck(:internal_name)
  end
Another change that we added is allowing custom fields in strong params.
This means that we can set our own custom fields through form submissions.
Updating the Custom Fields Controller
Our CustomField Model also depends on the Shop model through association. So we should make a Custom Fields Controller nested from the Shop Model.
Open the products controller file:
nano app/controllers/custom_fields_controller.rbChange code of custom fields controller to this:
class CustomFieldsController < ApplicationController
  before_action :set_shop
  before_action :set_custom_field, only: [:show, :edit, :update, :destroy]

  def index
    @custom_fields = @shop.custom_fields
  end

  def show
  end

  def new
    @custom_field = @shop.custom_fields.build
  end

  def edit
  end

  def create
    @custom_field = @shop.custom_fields.new(custom_field_params)

    respond_to do |format|
      if @custom_field.save
        format.html { redirect_to shop_custom_fields_path(@shop), notice: 'Custom field was successfully created.' }
        format.json { render :show, status: :created, location: @custom_field }
      else
        format.html { render :new }
        format.json { render json: @custom_field.errors, status: :unprocessable_entity }
      end
    end
  end

  def update
    respond_to do |format|
      if @custom_field.update(custom_field_params)
        format.html { redirect_to shop_custom_fields_path(@shop), notice: 'Custom field was successfully updated.' }
        format.json { render :show, status: :ok, location: @custom_field }
      else
        format.html { render :edit }
        format.json { render json: @custom_field.errors, status: :unprocessable_entity }
      end
    end
  end

  def destroy
    @custom_field.destroy
    respond_to do |format|
      format.html { redirect_to shop_custom_fields_url(@shop), notice: 'Custom field was successfully destroyed.' }
      format.json { head :no_content }
    end
  end

  private

  def set_shop
    @shop = Shop.find(params[:shop_id])
  end

  def set_custom_field
    @custom_field = @shop.custom_fields.find(params[:id])
  end

  def custom_field_params
    params.require(:custom_field).permit(:label, :internal_name, :field_type, :description)
  end
end
Now our products and custom fields are associated with particular shops. We can modify the view templates themselves, which are where users will pass in and modify post information about specific resources.
Modifying Views
Our view template revisions will involve changing the templates that relate to products. Let’s start with the foundational template for our products – the form partial reused across edit and new templates. Open that form now:
nano app/views/products/_form.html.erbFirst that we should do is сhange the first line of the file to look like this, reflecting the relationship between our shop and products resources:
<%= form_with(model: [@shop, product], local: true) do |form| %>Next step, add the section for custom fields that relate to the shop.
<div class="field">
    <% @shop.custom_fields.each do |field| %>
      <%= form.label field.internal_name %>
      <%= custom_field_input(form, field) %>
    <% end %>
</div>
As you can see, we use the custom_field_input method for displaying inputs fields of our custom fields. Method custom_field_input should be placed in app/helpers/custom_fields_helper.rb you can copy the code of the practice from our GitHub repository.
Result after pasting editions.
<%= form_with(model: [@shop, product], local: true) do |form| %>
  <% if product.errors.any? %>
    <div id="error_explanation">
      <h2><%= pluralize(product.errors.count, "error") %> prohibited this product from being saved:</h2>

      <ul>
      <% product.errors.full_messages.each do |message| %>
        <li><%= message %></li>
      <% end %>
      </ul>
    </div>
  <% end %>

  <div class="field">
    <%= form.label :name %>
    <%= form.text_field :name, id: :product_name %>
  </div>

  <div class="field">
    <%= form.label :description %>
    <%= form.text_area :description, id: :product_description %>
  </div>

  <div class="field">
    <%= form.label :price %>
    <%= form.text_field :price, id: :product_price %>
  </div>

  <div class="field">
    <% @shop.custom_fields.each do |field| %>
      <%= form.label field.internal_name %>
      <%= custom_field_input(form, field) %>
    <% end %>
  </div>

  <div class="actions">
    <%= form.submit %>
  </div>
<% end %>
Next, open and the show template:
nano app/views/posts/show.html.erbMake the following edits in the file:
<p id="notice"><%= notice %></p>

<p>
  <strong>Name:</strong>
  <%= @product.name %>
</p>

<p>
  <strong>Description:</strong>
  <%= @product.description %>
</p>

<p>
  <strong>Price:</strong>
  <%= @product.price %>
</p>

<p>
  <% @shop.custom_fields.each do |field| %>
    <strong> <%= field.label %>:</strong>
    <%= @product.custom_fields[field.internal_name] %>
  <% end %>
</p>

<%= link_to 'Edit', edit_shop_product_path(@shop, @product) %> |
<%= link_to 'Back', shop_products_path %>
This code section below in our show template displays the values of our custom fields.
 <% @shop.custom_fields.each do |field| %>
    <strong> <%= field.label %>:</strong>
    <%= @product.custom_fields[field.internal_name] %>
  <% end %>
Now you are made changes to your controllers, and views to ensure that products are always associated with a particular shops. As a final step, let’s start testing our Rails Application.
Testing our Application
Start your local server by running this shell script
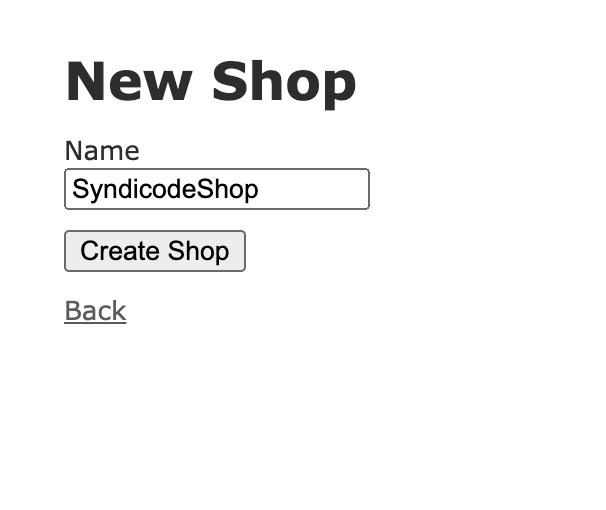
rails sLet’s create our first shop record in our Rails application. Visit localhost:3000/shops/new and enter the name for a shop after a click on the “Create Shop” Button. See picture 1.1.
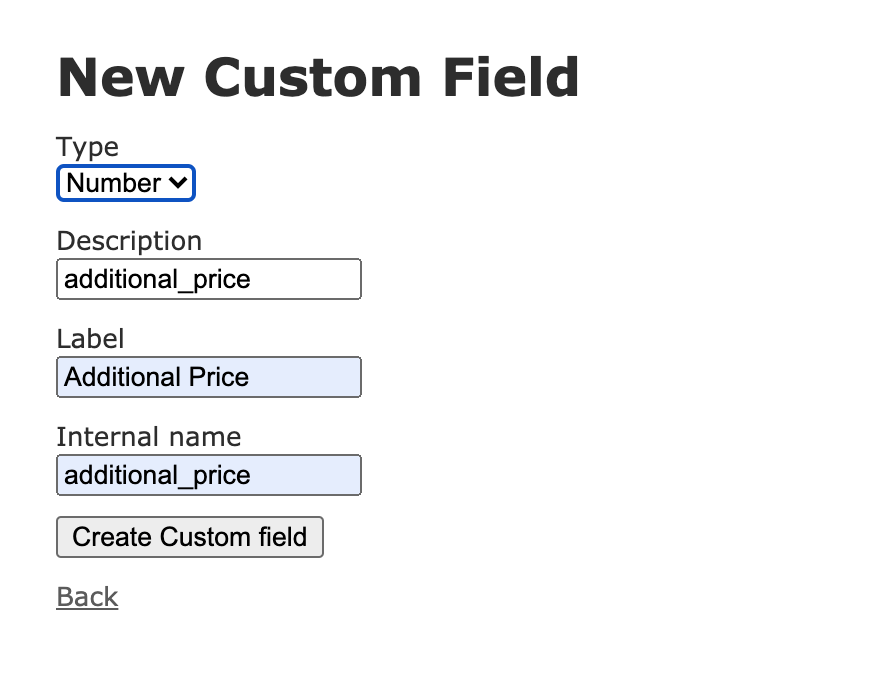
We need to store information about our custom fields, so create our first custom field record associated with the product model. Use should visit /shops/1/custom_fields/new and enter data that displayed in picture 1.2.
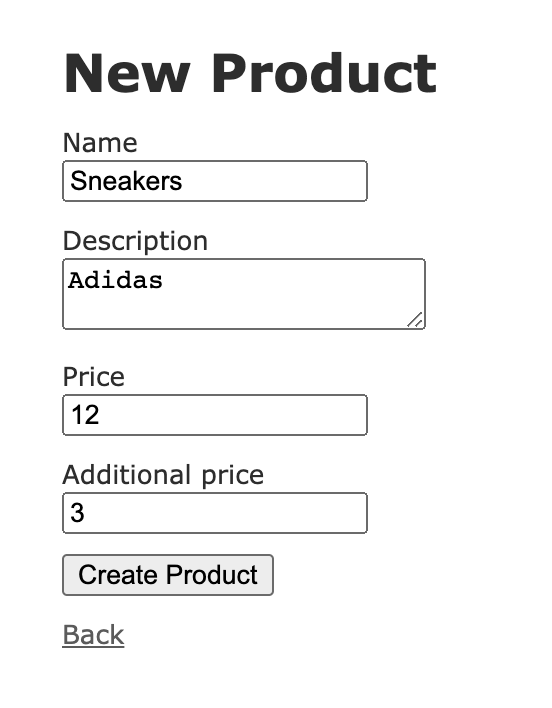
Visit /shops/1/products/new path. As you can notice, now our products form a custom field that can be set as a regular field. You can fill product form as displayed in picture 1.3.
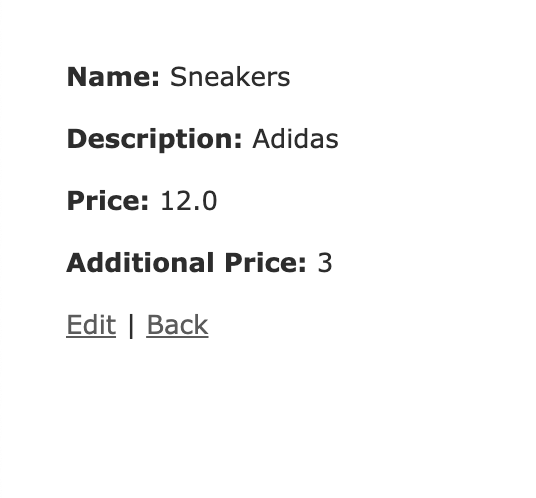
In picture 1.4 we see that our additional custom field feature works, and we can create other custom fields that we need.
Summary
That’s it. We’ve archive our goal, we have created a Rails application where users can create their own shop with products that will have custom fields.
In the first part, I told you about the Decorator Pattern and ActiveRecord objects, and we discover how to create the basic architecture for custom fields feature.
And in the second part, we are the finish developing the controllers and views layer of our Rails Application.
Thank you for going through this tutorial with me, hope it was helpful and you like it!
You can find Syndicode on GitHub and explore the example of the readymade app.
